You will need three “keys” to link a Woocommerce web shop: an API key, a secret API key and a secret webhook key.
Before creating the link, make sure that all 'open' orders have been processed in your Woocommerce web shop. This will avoid possible differences in stock levels.
Create API keys
The API link allows Webship to communicate with your Woocommerce web shop. This includes requesting orders and product information, adjusting order statuses, etc. Below we will provide a step-by-step plan to link a Woocommerce web shop to Webship Online.
- Log into your Woocommerce web shop
- Navigate to “Woocommerce” => “Settings” => “Advanced”
- Click “Rest API”
- Click “Add key”
- Under “Description”, enter: Webship Online
- Under “Rights”, select: Reading/Writing
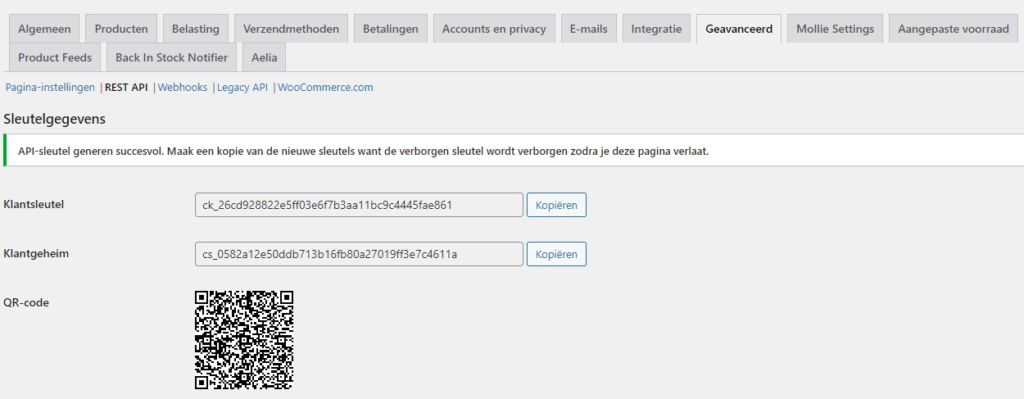
- You will see the first two keys
- Attention: do not close this window, you will only get to see these keys once
- Open Webship Online in a new tab or window
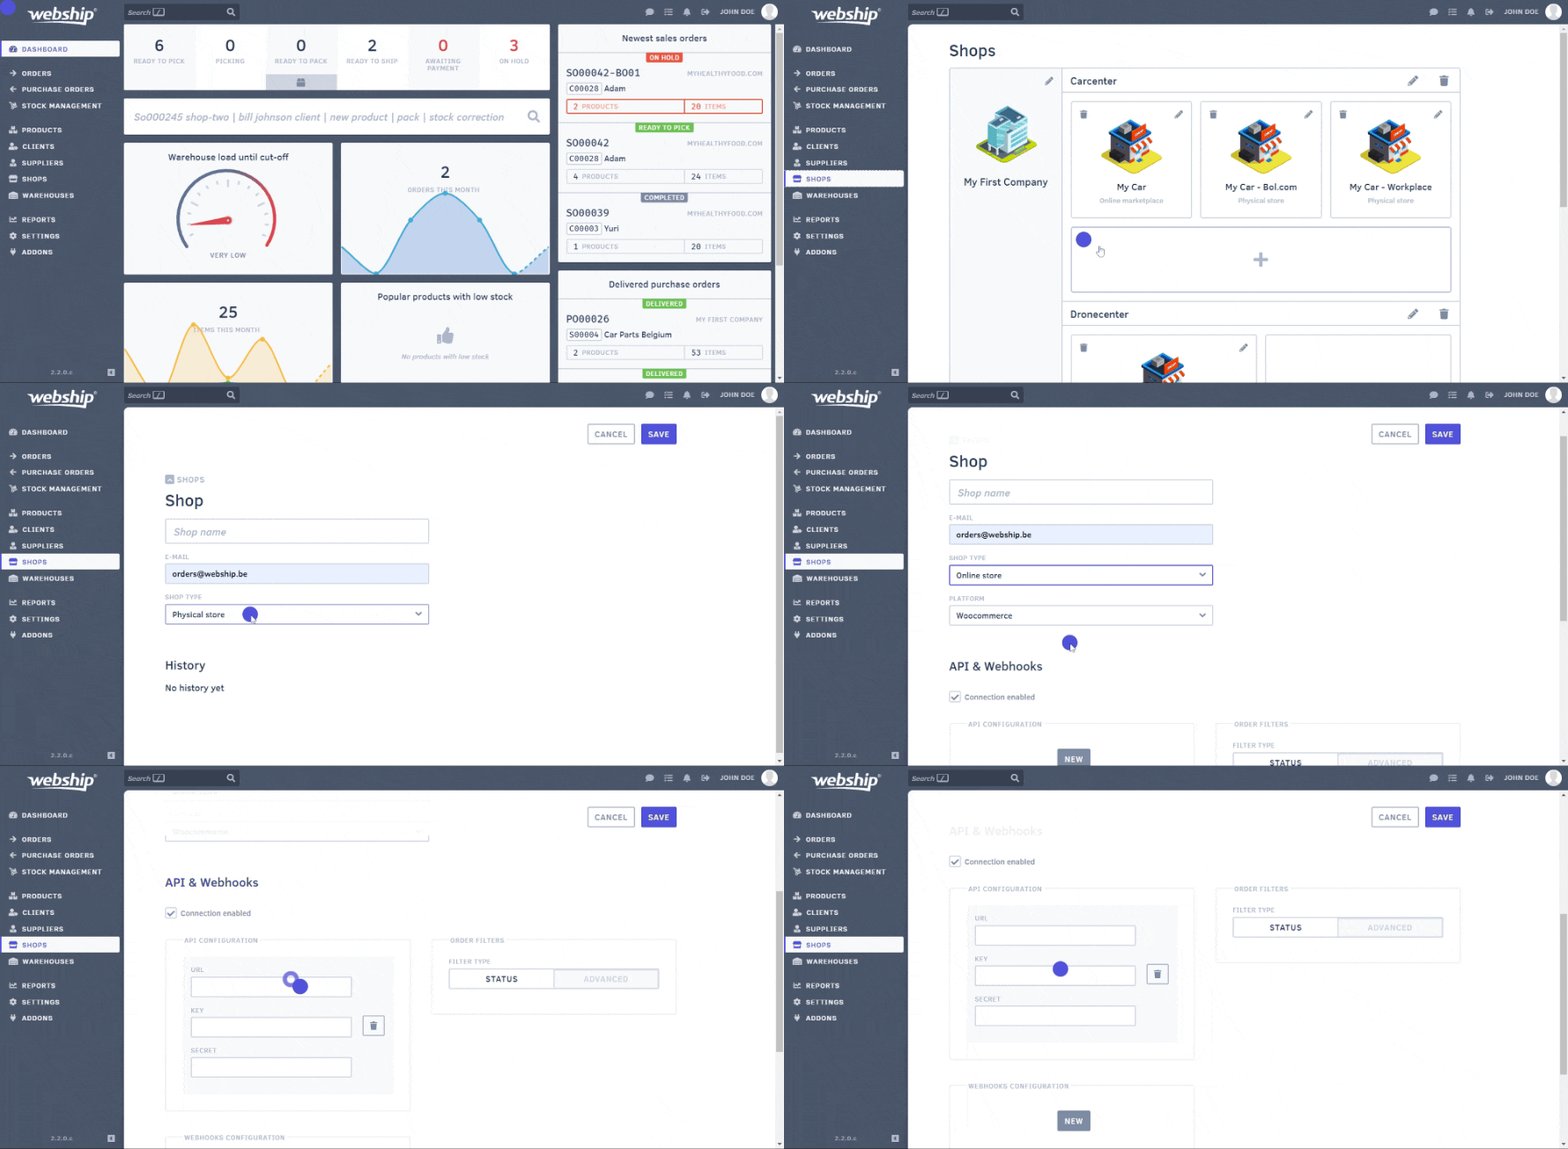
- Navigate to “Shops” and add a new shop
- Assign a name to the shop and select “Online shop”. Then select “Woocommerce”.
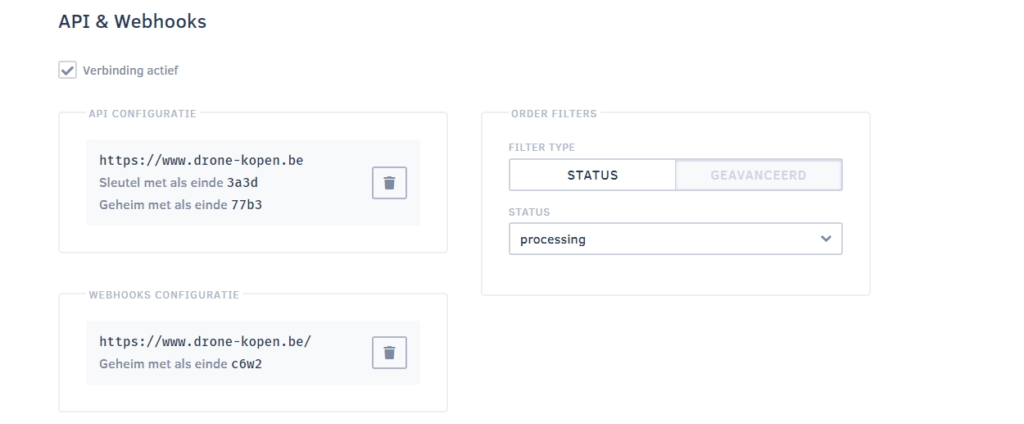
- Enter the two keys that were generated under “API configuration”:
- API key = customer key, API secret = customer secret
- Don’t forget to enter your web shop’s complete URL (including http or https) under “API endpoint”
- Do not close the window in Webship Online but go back to Woocommerce
After setting up the API and before setting up the webhooks, you should synchronise products and orders, in that exact order. After setting up the API keys, you will see two synchronisation buttons under your API settings in Webship Online.
Add webhooks
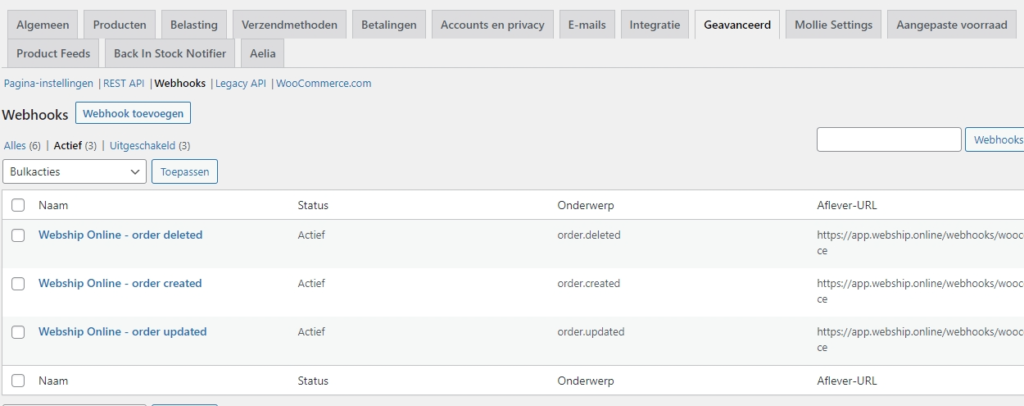
Webhooks make sure that Woocommerce updates our application of any changes in orders in real time. Without webhooks, Webship Online will only receive the changes at fixed times and not in real time.
First webhook: order updated
- Finally, we need to add three webhooks in Woocommerce. This is to ensure that changes in order statuses in Woocommerce are also sent to Webship Online
- Let’s start with the first webhook
- In Woocommerce navigate to “Woocommerce” => “Settings” => “Advanced” => “Webhooks”
- Click “Add webhook”
- Complete the following fields:
Name: Webship Online – order updated
Status: Active
Subject: Order updated
Delivery url: https://app.webship.online/webhooks/woocommerce
Secret: (leave open for now)
API version: WP REST API integration V3 - Click “Save Webhook”
- The “Secret” field will be completed automatically after saving
- Copy this secret key and return to Webship Online
- Under “Webhooks configuration”, enter this secret key provided under “Secret key”
- Don’t forget to enter your web shop’s complete domain name under “Origin” (including http or https)
- Determine which orders you want to receive in Webship Online by using the status filter or an advanced filter (“processing” is the most commonly used status).
- Save this configuration in Webship Online
Second webhook: order created
- In Woocommerce navigate to “Woocommerce” => “Settings” => “Advanced” => “Webhooks”
- Click “Add webhook”
- Complete the following fields:
Name: Webship Online – order created
Status: Active
Subject: Order created
Delivery url: https://app.webship.online/webhooks/woocommerce
Secret: copy the previously created secret key from the first webhook here - API version: WP REST API integration V3
- Click “Save Webhook”
Third webhook: order deleted
- Click “Add webhook”
- Complete the following fields:
Name: Webship Online – order deleted
Status: Active
Subject: Order deleted
Delivery url: https://app.webship.online/webhooks/woocommerce
Secret: copy the previously created secret key from the first webhook here - API version: WP REST API integration V3
- Click “Save Webhook”


