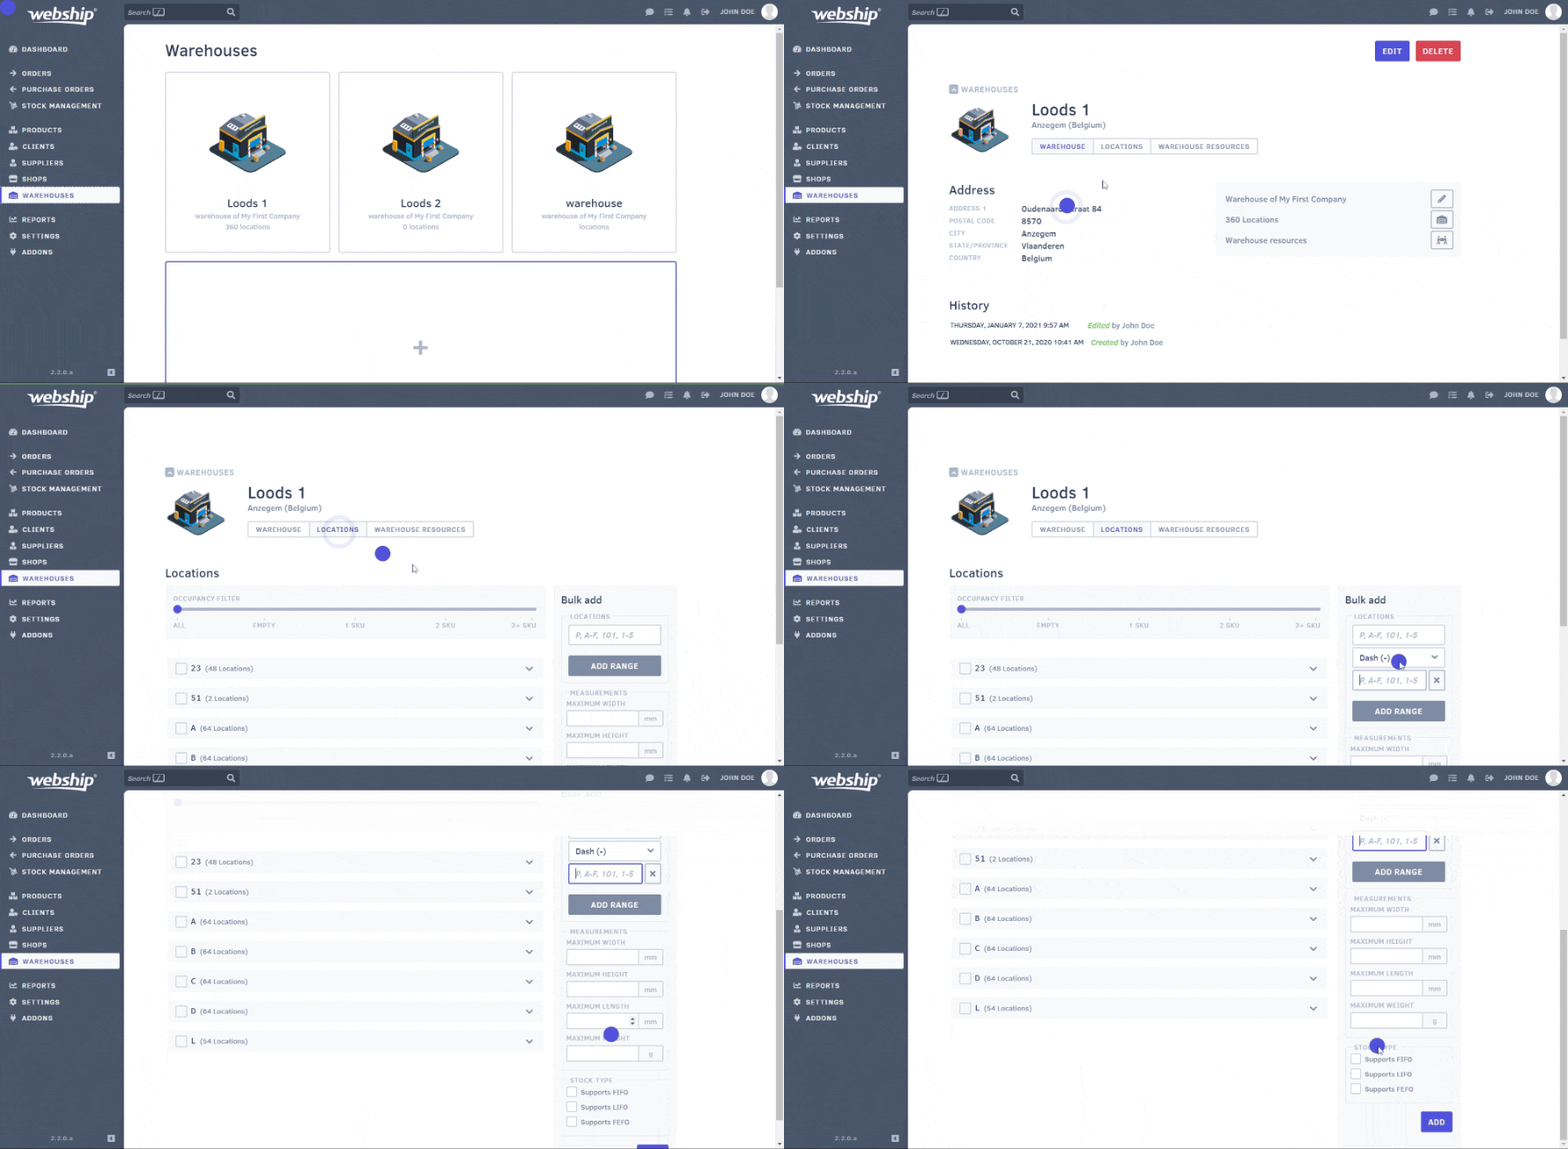
To manage warehouse locations, you first need to open an existing warehouse. The overview screen shows all your warehouse locations. You can even apply a filter based on the maximum number of SKUs present at the warehouse location.
Add warehouse locations
You can add locations in bulk by using the navigation features shown at the right of the screen. First, define what your location numbers will look like (if want to know more about how to structure location numbers, take a look at the topic “1, 2, 3 start!”). You can then have all locations generated in bulk.
Suppose you have selected the structure: “LETTER-NUMBERS.LETTER” (with the letter sequences going from A-Z and number sequence going from 001-099). You can then add all locations in one move as follows.
Using the “dash” as a separator, you can indicate that sequences have to be created. If you write “001-099”, this will create a sequence starting at 001, 002, 003, … and ending at 099. These numbers will be preceded by all the letters of the alphabet (A-Z). In this particular example, locations will be created with the following format:
A-001.A, A-001.B, etc.
A-002.A, A-001.B, etc.
…
B-001.A, B-001.B, etc.
You can then select the maximum dimensions, maximum weight and stock type (if applicable).
If you then click confirm at the bottom of your screen, the system will create all of these locations. Depending on the number of possible combinations, this may take some time.
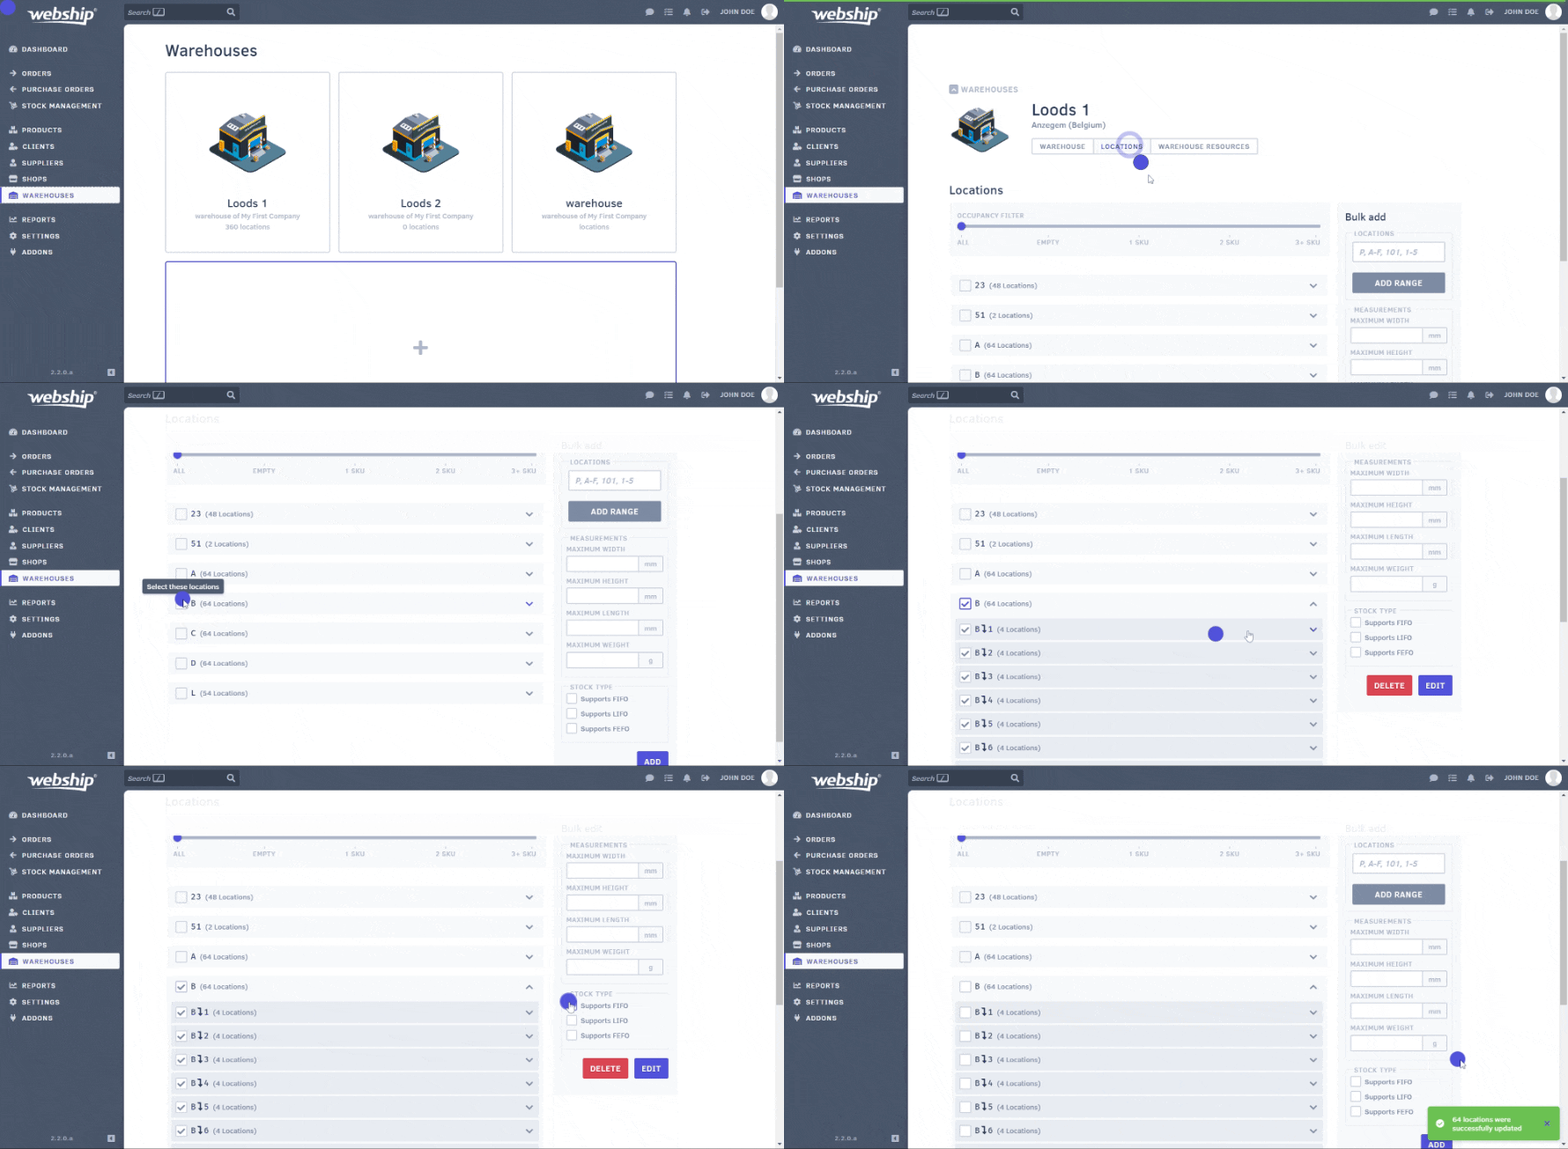
Edit warehouse locations
Warehouse locations can be edited. For example, you can edit the dimensions of a location or change the stock type (FIFO, FEFO, LIFO). Select the locations you want to adjust and make the desired changes. Then click “edit”. Deleting one or more locations is also possible, using this same method.


